Saturday, 1 February 2014

local insects and animals- Black flower wasps


Today I decided to add a new section to my blog; local insects and animals. Every so often we find an unknown insect or animal around the humpy and it causes a rush towards the book shelves and the computer to find out what it is and what it does. From now on I will add the results of these research missions to my blog (partly so I have a record of what we have already researched, as I suspect we have looked up some things more than once and forgotten the results).

Today's bug is.......the black flower wasp

My youngest daughter captured this photo of a black flower wasp on the lantana.


Haven't they got pretty wings.
My youngest daughter was fascinated by the lovely blue colour of the wings and by their solitary nature. According to the CSIRO these wasps are solitary wasps who are responsible for pollinating many Australian natives (and a few exotics too) they lay eggs in caterpillars to reproduce. So many Australian native insects tend to be solitary, I wonder why they have evolved this way?
Given the worrying drop in the bee population of the world, I think it is important to encourage other insects who are capable of pollinating our food crops, or we may find ourselves very hungry. While the black flower wasp is known to pollinate mostly native plants, there is so little research on them that they may also play a large part in pollinating high nectar food plants like pumpkin, melons and marrow.
They enjoy high nectar plants and undisturbed mulched areas, so make sure you have some of this habitat in your garden and you will have these delightful wasps to entertain you and help control Caterpillar populations.

Lammas....the festival of first harvest


Today we are celebrating Lammas; the festival of first harvest, or the bread feast.
At Lammas we harvest seeds from our crops; an activity filled with symbolism. When we harvest seed from our crops we are reaping the rewards of our labors during the season (if I hadn't planted, weeded and carried bath water to the silverbeet all summer, I wouldn't be harvesting seeds from it now), we are also gathering the hope for future seasons (I will plant the seed I harvest to grow more silverbeet).

Lammas in Australia


The song 'John Barleycorn must die' is a song about the yearly cycle of grain growing...symbolically.

This year we made a bread man to share and harvested the corn we planted in the sacred garden at Ostara. We also made some corn dolls to be buried with the corn when we plant it next Ostara.
Corn dolls are a really old tradition/ art from our various ancestors; making a doll from some of the harvest gives the spirit of the grain a place to live until it is planted again. They also make a sweet little decoration for the altar.

Amerind corn dolls
Celtic corn dolls

How to make corn dolls


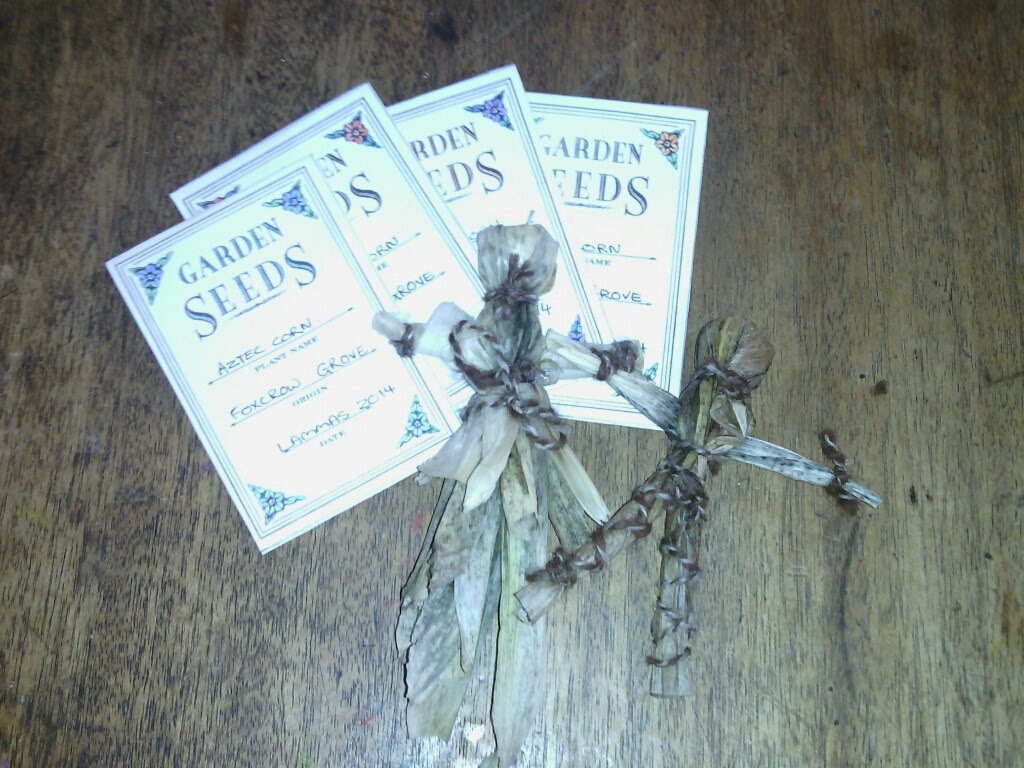
The seed packets I made to hold our corn seed.

The corn dolls and some seed packets.

A close up of my Corn Lady, she is tied together with home spun wool (that I spun myself)

The Bread Man, he represents a thank you for the sacrifice the wheat makes so that we can eat bread for the year.

Our Lammas altar.


Hanging the Corn Lord mask

The corn before the harvest in the sacred garden.

The altar in the dusk.

It's almost time to replant the sacred garden. There are still pumpkins in there for Samhain though (well, A pumpkin)

Harvesting the corn


The Bread Man loses his head (with an appropriate thank you)

Bread Man dipped in honey; is there anything more yummy at this time of year?

We also got a cute twinned cob


Sunday, 26 January 2014

Pit toilet update


At last we have restarted work on the long planned five star pit toilet. It has become increasingly urgent for us to have a new toilet hole (the old one is getting uncomfortably near the end of it's usefulness).
Over the previous month or so we have all had a go at digging the pit deeper and wider, and it is almost deep enough at last. Today my (fairly reluctant) partner and eldest daughter were chased outside to begin building the framing for cement frame that will support the floor over the pit. Once the cementing is completed we will lay the floor over the pit (two sheets of really thick ply wood with a hole drilled in one), organize a pedestal (of some sort), put up a temporary shelter and it will be usable. The building part will be put together over the next six months or so.


The start of the frame for cement 'stem walls' to hold the floor up above the moisture and stuff.


The finished frame work, ready for cement.

The two sheets of ply for the floor, 


Nothing to do with toilets, but our baby guinea fowls have grown up enough to be out in the yard with their mum.

Everyone watches the cement mixer go around and around and around and...

Six or seven mixes later.

It's almost full.

Smoothing out the top.

All done.

Roady (the butcher bird) fancies himself a building inspector.

Last minute touch ups after the dogs and sheep have inspected the work.

We admire our work as the sun goes down.
The next stage is to dig some more out of the pit (the deeper the better) and to  begin the building of the toilet. I look forward to it.

Just updating this post with a photo or two of the recent digging.

The hole is now 1.4 x 0.8 x 0.9 m; a tiny bit over one cubic metre of hole (I think)


My eldest daughter busily scooping out gravelly soil.

Saturday, 25 January 2014

A new craft....embroidery.


Recently I have been messing about with embroidery. I don't know the names of the stitches or techniques as yet, but I am enjoying making pictures with my needle and silks. I made these little pieces for a CWA (Country Women's Association) craft competition and I am fairly proud of them.

A Wedge-tailed Eagle.

A sheep (the wool on my sheep is spun from Border Leicester wool on my drop spindle)

A scythe and wheat sheaf.
I don't think they will win any prizes, but I have really enjoyed making them and think I may have to learn more about embroidery.

Sunday, 19 January 2014

An e-book worth buying.

I wrote an e-book!

Linda Woodrow has just released an e-book with recipes for healthy muesli bars. If you ever have to fill a lunchbox, for anyone, this is the book for you.

Saturday, 18 January 2014

Making pasta sauce


The tomatoes in the Hugelkultur bed have been supplying us with yummy Roma tomatoes for some time now and we have added them to most lunches and dinners (and the occasional breakfast), we are all at the 'I don't like tomatoes any more' stage, reached at some point in every harvest season when there is a glut. Therefore, I decided (this morning) to make some pasta sauce and bottle it using my trusty but under utilized Fowlers Vacola (FV) unit. That way we can have our tomatoes to eat in the winter when we are all craving them. I decided to use glass jars with metal lids (the ones you buy pasta sauce in in the supermarket) instead of the traditional FV jars because the FV jars I own are all huge (1 litre is the smallest) and we use our pasta sauce in small lots so the smaller jars are more practical for us.

A bucket of Roma tomatoes from the garden

Stage one of the Hugelkultur beds cleared and waiting for a compost top up and mulch before replanting.

I found a fairly easy recipe for tomato pasta sauce that can be preserved using the water bath method. The recipe below has been copied from the Brisbane Local Food site and changed only slightly. The link in the title will take you to the original post.


Home made pasta sauce
Makes 1.5 cups

You need a large non stick frying pan or a wok and a stick blender

1/3 cup of extra virgin olive oil
1 onion, finely chopped
1 fresh bay leaf
500g ripe tomatoes, roughly chopped
2 cloves of garlic, finely chopped
8 sprigs of basil, oregano or mint
sea salt, ground black pepper. About 2/3 tsp of salt per 1 1/2 cups of sauce is recommended.

Heat oil to medium heat, add onion and bay leaf, cover and cook for 5 minutes or until onion is softened but hardly coloured. Add tomatoes, garlic and herbs. Cover, cook on medium heat, stirring frequently until tomatoes have collapsed. Add seasonings and blend until the sauce is a pleasing consistency and you are ready to bottle.

Preserving
Put sauce into clean, sterilised jars with good lids that will vacuum seal. If the pulp is still really hot, put a sterilised spoon in the jar before filling to prevent cracking. Place jars in a water bath up to their necks and bring the temperature up to 93.3 degrees Celsius (or 200 degrees Fahrenheit).
Hold at this temperature for two hours. Remove from the preserving pan and press down the lids to encourage vacuum sealing.

N.B. The Fowlers Vacola manual states that unless you use all their gear they won't be held responsible for these instructions being no good.

The chopping begins

But not before they get a good wash

Pasta bottles; found, de-labeled and washed by my eldest daughter (thanks hon)

The sauce; boiled, seasoned and blended, ready to bottle.

My good old FV stove top unit. Isn't she a beauty?

The bottles in their bath, all carefully positioned so they don't touch each other or the sides. Fowlers Vacola frowns on touching in the bath.

The final result; six yummy bottles of pasta sauce. I had better label them before I forget what they are though.

I want to do more preserving, it's so much fun.