Wednesday, 10 September 2014

Spinning and plying cotton - part one.

Spinning cotton is hard but not impossible.
Most of the reading I have done leads me to believe you need cotton carders, a takhli or Charkha spindle and immeasurable patience. Having none of these things I just used what I had and did it anyway.
I spin my cotton without all the traditional equipment; no cotton carders; no supported spindle or  Charkha. I use my wool carders to prepare the fibre and spin it on my old faithful traditional spinning wheel.

The first part of the journey is to prepare the cotton. I am lucky enough to have a sister who grows cotton so she occasionally brings me a garbage bag of bolls (the 'fruit' of the plant; a lot of seeds with a cotton ball attached). These bolls need to have the vegetable matter and the seeds removed before being carded into submission ready for spinning.

Removing the seeds and the vegetable matter is not a process that can be rushed; I sit and pick the seeds out of each boll individually along with any large bits of vegetation. It takes about two full bolls to 'charge' the cards (charging the cards is a fun way of saying 'put enough on one carder to make a rolag'). The cotton is then carded or combed from one carder to the next until all the vegetable matter has fallen away (some has to be picked off) and the fibre is smooth.

The usual method is to make punis from the carder cotton by wrapping the little mat of fibre around a stick really tightly to make firm rolag of fibre. I prefer to make mine into nests of soft and fairly airy rolags (a rolag is the mat of carded fibre from the carders rolled up into a cylinder).

Carders and cotton, ready to go (and a drop spindle that photo bombed the shot)

The cotton boles; the brown stuff is vegetable matter

The lump in the middle of the cotton ball is the seed; there are between two and ten of these in every bole

The cotton all loaded onto my carders and ready to be tamed

I don't make traditional punis, I just make the usual nest, the same as wool.

It takes 26 nests to fill a bobbin on my spinning wheel, so the preparation takes a long time. The next step is spinning the cotton, which has its difficulties too.

Tuesday, 2 September 2014

Lambs update - they grow up so fast


The lambs are growing up so fast...
They have been locked up in the lambing paddock since they were born but now they are big enough to be let out. Yesterday I opened the gate for four very bored and demanding ewes and four very excited lambs. They all ran around and rolled in dirt piles before settling down to some serious nibbling. The lambs are now eating grass and leaves as well as drinking milk.

Nut making sure I get her good side

Everyone down by the duck dam

Tired babies

This is Wolfie, the youngest lamb. Growing up fast


Sunday, 31 August 2014

Building a laundry/ bath house with old tires, eco bricks and mud/ cement - part one; underway


The small excavator has been and gone (what a wonderful little machine it is) leaving a trail of half finished projects in its wake. The pad for the laundry/ bath house is dug out, levelled and a swale dug up hill to slow water flow down the slope and under the building. We also dug a spare toilet pit (for possible future use) and made a tank pad near the house for the 5000 gallon tank, then moved the big tank into place.
That has left me with piles of soil all over the place, some of which will be used to mix with cement and fill the foundation tires for the laundry. The best of that soil is destined to become the next section of my Hugelkultur beds and fill various planters around the place.

Rabbitto and a guinea fowl watch as the excavator digs the pad for the laundry

The laundry project has begun
The old tank on the humpy

Digging down so the bigger tank will fit under the gutter

The big tank which fits perfectly, but does dominate the front yard. Yes it oes tilt slightly down hill; the sand base sunk on that side.

Obviously part one of the laundry/ bath house project is not finished yet, but it has begun and I hope to have the foundations down by next weekend ('hope to' doesn't always equal'will' though). What an exciting time I am having at the moment.

Wednesday, 27 August 2014

Rabbitto and Rabbitta - two more of our strange animals


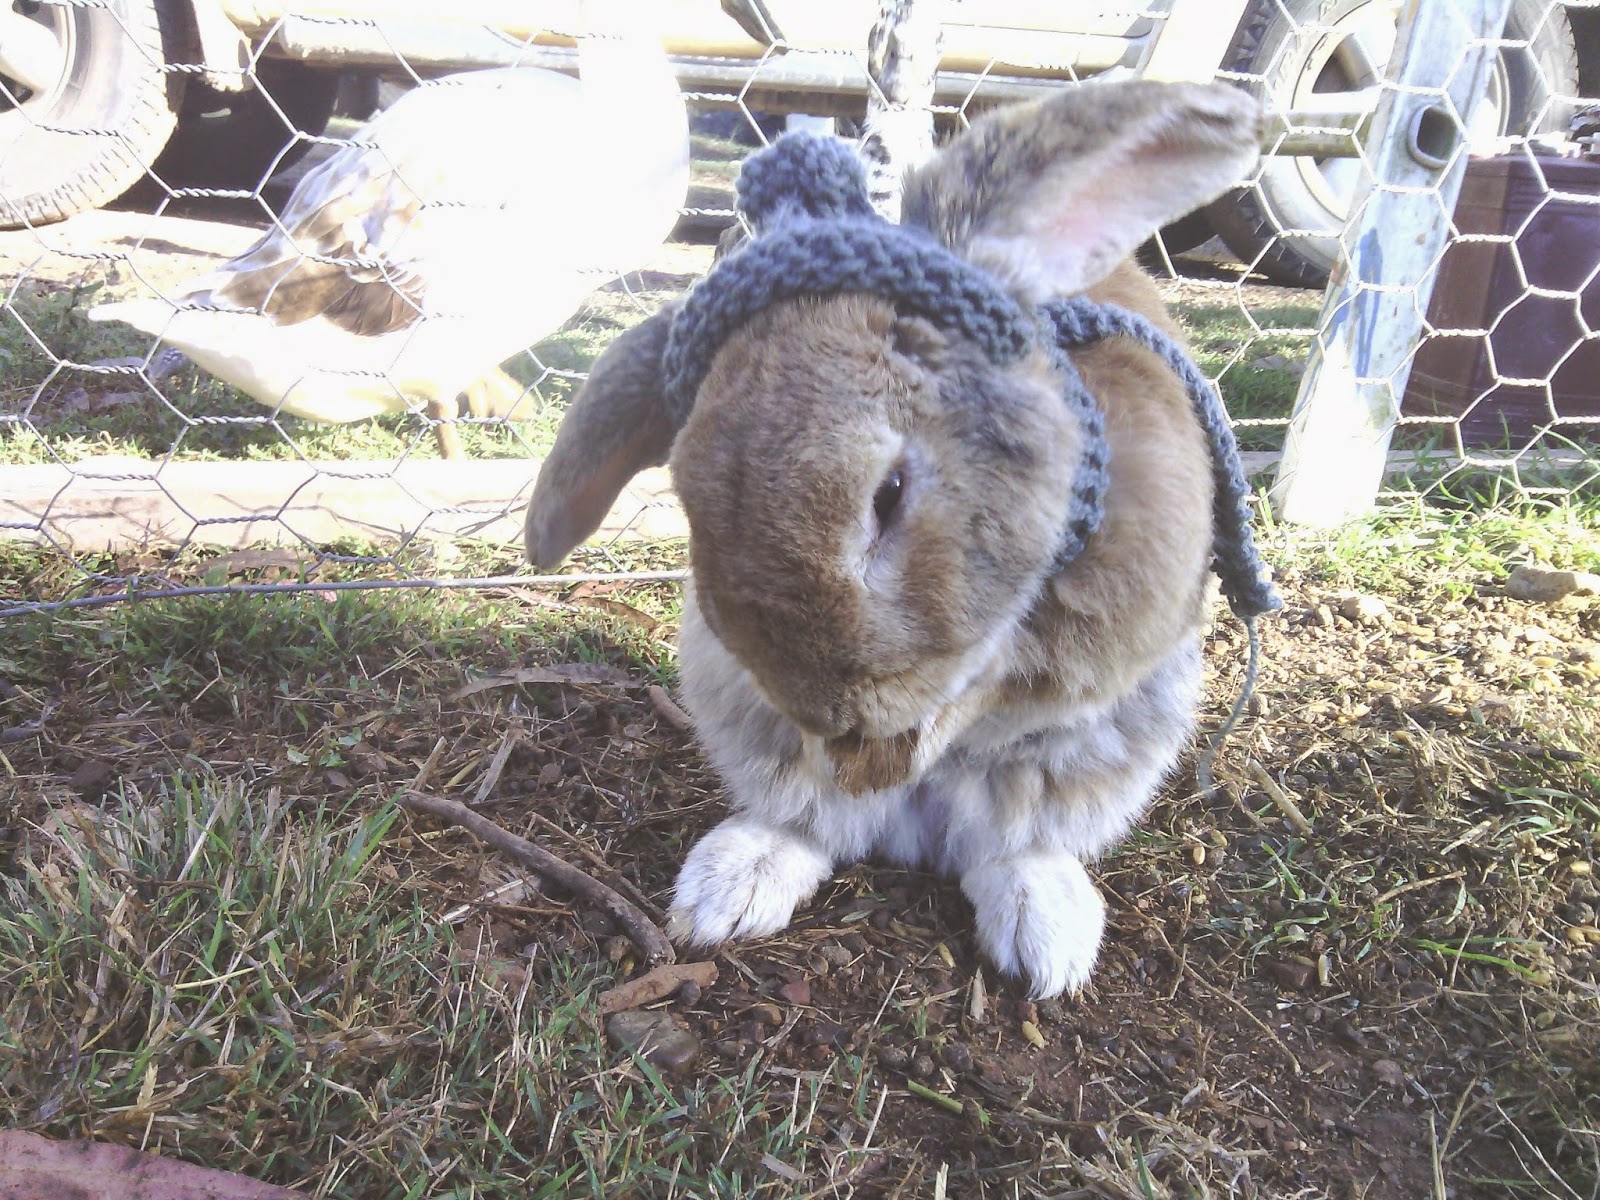
Rabbitto, wearing the hat and scarf my daughter made for him (reluctantly)


We have a rabbit who lives with us, my eldest daughter bought him home about five years ago because his owners didn't want him and were going to put him down (she does that all the time). We call him Rabbitto. For the first four years with us he lived in a fairly large hutch, by himself. It always bothered me that he was alone because rabbits are social creatures and they need company. About a year ago I decided that he would be happier running around the yard, even if only for a short time (considering the predators that hunt in the area (cats, hawks, owls, etc), so I let him out and my daughters made up some shelters around the yard for him.
He is still there in the yard after a year, so I guess he is smarter than he looks. Lately we have noticed something; he has a girlfriend (or possibly a boyfriend), a wild rabbit who comes to visit and bond over the rabbit food we supply. We haven't seen rabbits in the local area before so she/he may be new to the property. We call her Rabbitta (assuming that our rabbit is heterosexual), she comes to play with Rabbitto through the fence and has dug her own little entrance into the yard which Rabbitto has ignored thus far. They run up and down the yard and jump around like mad followed by a quick nibble of rabbit kibble and a snooze in the sun side by side.

Rabbitto, in his winter coat (he wears the jacket mush better than a hat and scarf)

Rabbitta, blurry because the photo is taken at the extreme end of the camera's zoom function. She is a wild rabbit after all.

Rabbitto and Rabbitta having a rest in the sun


Talking through the fence.


I know there are many possible disasters in this scenario;
Over breeding of rabbits in our yard and surrounds
transfer of diseases from wild rabbits to our rabbit
holes all over the place
Rabbitto deciding to elope with Rabbitta

BUT; to me the advantages outway the possible disadvantages (so far);
Rabbitto is happy and fulfilled, waiting for Rabbitta to visit each day.
I love to watch them play together
They keep the lawn mowed between them

What do you think; am I being short sighted, should I nip the romance in the bud (probably full flower by now, rabbits court fast)?

Building a laundry/bath house with old tyres, eco bricks and mud/cement - part one; planning


We need a real kitchen...at the moment our kitchen is cobbled together from bits of unused furniture (my bench space is an old massage table) and a sink unit I was given. My partner's brother was given an old modular kitchen (from the 70's, so it will have some interesting colour combinations) which he is storing for us, but we can't put it in the humpy until we have a floor to put it on, which involves moving the current bathroom out.
The current bathroom has a floor made from an metal old window shade (one of those industrial metal grid things) with sheets of aluminium screwed onto it and lino over the top. This all has to come out (as well as the bath) and a new tire and ply floor go in. This means that we need a new bathroom away from the humpy while we build.

This is the current floor, you can see the metal frame around the lino. Not pretty, but it works.


The bathroom floor (please ignore the dirty shower curtain) 

The plan is to build a laundry/bath house up the slope from the vegetable growing area so that all that lovely (nutrient rich) water can use gravity to find it's way back to the Hugelkultur vegetable beds, instead of being carried out in buckets which is how I do it at the moment. Eventually there will be a shower in the house also (for those cold winter nights), but until then we will have the bath house. I want to have a go at building with old tyres and my eco bricks, because we have plenty of them around and because they create a negative carbon footprint when reused for building.

My plan so far is very simple;


 As usual my madness is being fueled by Youtube and internet research;

The plan is to use a small excavator (hired for the occasion) to dig the foundation out (amongst other things), put the strip footing (tires and mud) and the four corner poles in. Then we will put up the pole frame and the roof. After that comes the corrugated iron outer walls, the floor and the bath put in (complete with outlet to drain to the vegetable garden). The first layer of eco bricks will go in around then too, but we will have to keep chipping away at the inner walls as eco bricks become available (we only make one or two per week). Getting water into the laundry for washing is easy; we will tap into the pipe running from the header tank up the hill to the humpy, and let gravity do it's thing. Getting water for the shower is another story as the fall is not great enough to gravity feed water to an overhead shower. That is a problem for part two.

Next comes getting the shower operational and putting up a new clothes line. Look out for part two.


Monday, 25 August 2014

An old sewing machine reborn - testing Daisy's sewing ability.


Daisy, ready to sew


My last post was about my efforts to fix up an old Singer 201K treadle sewing machine; Daisy.
To test her ability to sew (and make all those little adjustments) I made up a new peg bag for the line.

Daisy sews well...even though the 201 is a straight stitch only machine, the stitch they sew is strong and even (when the tension is right), and they can sew through a single layer of cotton and straight on to leather without any adjustment.

Daisy doing what she was made to do. Making a happy little hum.

A closeup of the top stitch, set on 8 stitches per inch

A closeup of the bottom stitch, set on 8 stitches per inch

This is how I iron when sewing; the old iron is made from really heavy aluminium, it heats up and stays hot.

I iron on a folded blanket on the table. 

The finished peg bag, it turned out well, except for some pinches in the corner of the opening (my mistake, not Daisy's)

Daisy all set up to sew

Daisy, packed away nice and neat

So Daisy the Singer 201K is fixed, adjusted, oiled and polished. Ready to go to her new home, once I print out a manual and whip up a pin cushion.
The advantages of using a treadle machine are many;
uses no electricity (you can sew in a blackout)
the machines are virtually indestructible (I'm sure they would survive a bomb blast)
The stitch is even and strong and the sewing is quiet and easy
The machines are beautiful to have around 
You get some exercise while sitting down sewing

Do you know anyone who wants her?

An old Singer sewing machine reborn


A few weeks ago a friend gave me the huge gift of a Singer 201 treadle sewing machine. I am not a sew-er (yet) but I have fallen in love with these old sewing machines. They are such well made machines (how many cars are still going after almost eighty years?) and they have a certain grace and beauty about them. I restored one for myself several years ago, then one for my youngest daughter last year (she likes to sew). Now I have a new project to play with.

First some background.......
Singer sewing machines in general.
The 201-1 specifically
The cabinet (model 46)

Finding her age and place of birth.....
Her serial number is; EC664342. The SingerCo site says she was made on 6th March, 1940 in Clydebank, Scotland, making her 74 years old this year.


How to refurbish the old girl.......
A very useful blog
Another useful blog with detailed pictures
A great source of parts for all sorts of sewing machines


My first move was to oil all the inner workings with 5 in 1 oil (Singer oil is better, but I didn't have any), this let me feel where the sticky bits are as I turn the wheel and treadle the peddle (so to speak). I also wiped the old girl down with a rag and 5 in 1 oil to start the cleaning process.
She was in fairly good shape; just needing a spray of kerosene in the inner workings to ungum all the moving parts. Basically I squirt kerosene into all the oil holes, remove the face plate and inspection plate then squirt some kerosene in there too and drip some around any moving parts. After sitting like this overnight I wipe her all down with clean rags, take off any bits that still look grotty and scrub them with an old toothbrush (and kerosene of course).

The next step is replacing any worn parts; she only needed a new bobbin winder ring, drive belt and some new needles and bobbins.

Last of all is the fiddly bits; cleaning and calibrating the tension assemblies. The upper tension needed new thread take up and beehive springs (don't you love the names of these parts). I took it apart very carefully and laid each part out in order so I wouldn't get confused. I cleaned all the bits and replaced the worn parts with new ones in the line up. Then I put it all back together again, as indicated by the handy tutorial.
Of course it didn't work... after a few dozen more tries and an hour poring over the tutorial, I finally realised that I had the tension indicator on back to front (the thing with the plus and minus signs on it). After that it was plain sailing.

The lower tension/bobbin case area was easy to take apart and clean. I just followed the tutorial (a different one this time) and cleaned her up, there was a lot of dirt and lint in there.
The upper tension unit removed, look at all that dirt.

The bits that make up the upper tension assembly, hope I can put it back together.

The lower tension assembly with the bobbin case removed

The bobbin case and feed dogs, all in need of a clean
The next step is to try her out, I thought I would make a new peg bag. Then I will set her all up with;
A users manual
a pincushion and pins
spare bobbins
spare needles
a cleaning brush
a bottle of 5 in 1 oil
spare reels of black and white cotton
a tailors measuring tape

And most importantly...a name. I am thinking Daisy (what do you think?)
I plan to sell the old girl on to someone who will love her and use her to make beautiful things.
How much is she worth?