Monday, 10 April 2017

Dye wool with fungus

We have had a lot of rain recently (and our tanks are full) so of course all the fungal spores in the soil have taken advantage of this and popped up mushrooms and shelf fungus everywhere. There is a lot of information online about dying wool (and other protein fibres) with fungus, so I decided to have a wander around and see what I could find to experiment with.

In the bush around our humpy I found many kinds of fungus after just a cursory look; I haven't tried to identify them as I am mostly interested in using them for dye. It's not a great idea to eat mushrooms you aren't able to identify, and I won't do it. I will also be using gloves to process my collected bounty, just in case they prove to be toxic.

Below is a collection of photos of the fungal and lichen life I found in my little adventure.


The plan is to dry most of the current harvest for later experimenting. I couldn't resist trying one little experiment though.
I used a lovely brown shelf fungus I found on a dead tree with two tablespoons of washing soda to make an orange/ yellow dye pot. I simmered the pot of water, fungus and washing soda for an hour. Then I plonked in some merino home spun yarn and let it all cool overnight.
After rinsing and drying I ended up with a golden yellowish coloured yarn that my daughter has named 'You dirty sheep', the name doesn't do justice to the colour which is actually quite beautiful. I can't wait to do some more experiments to see what I will get.

The little shelf fungus on the left gave the muted golden yellow of this yarn.


Thursday, 12 January 2017

Matching the wine to the fibre

Recently while wandering about in Etsy (in a cyber sense), I found a shop that sell wine holders for spinning wheels. I immediately wanted one of course, given that I have recently learned to make wine and I love spinning it seemed a perfect match.

I know it's not a wine glass, but one would fit in the holder.


That started me thinking about matching wines to fibre types. We match wine to our meals, why not other sensory feasts? I thought about it for a while and came up with the following list. You may find it useful if you purchase one of those wine glass holder things for your spinning wheel.

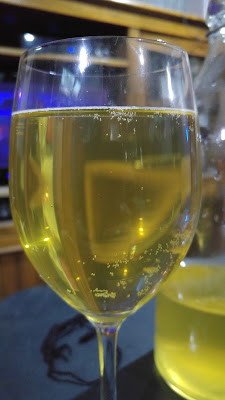
Chardonnay- One of the most common white wines, chardonnay should taste oaky, fruity and have a velvety feel in the mouth. This sounds like good old merino to me. Match your chardonnay glass with some hand dyed merino tops for spinning and you have the perfect spinning binge.

Pinot noir- This is a light red wine which is fairly common, it should be high acid, low tannin and taste of fruits and roses. One of it's defining characteristics is it is hard to make and is very easy to get wrong. This one sounds like cotton to me; both are difficult to get right and require exacting concentration. Spin up some naturally coloured cotton with a glass of pinot noir and see if I'm right.

Shiraz- This is one of the strong flavoured red wines, it should taste of peppers, cherries and maybe chocolate. It is known as a very long lasting wine as it remains stable and drinkable in a wide variety of conditions. Because it is such a strong, opinionated wine I think it would go well with border Leicester wool as both are strong, hard wearing and lustrous.

Riesling- This light flavoured white wine should taste of fruit and be generally sweet. Riesling is a high acid white wine making it long lasting, meaning it can be aged for a long time and still be drinkable. This quality makes me think of flax which is spun into the long lasting linen yarn. Linen also improves with age and is both sweet and crisp. 

Cabernet Sauvignon- This strong flavoured, high alcohol wine is one of the most common reds around, it should taste of vanilla and red currants. It is a very long lived wine and can be aged for centuries. This wine pairs very well with Lincoln longwool fleece which can also last for centuries in the right conditions. Grab a bottle of cab' sav' and some lincoln longwool fleece and get spinning.

Merlot-  This (relatively) light flavoured red wine is said to have a plum and herb aftertaste. It's low tannin makes it easy and soft to drink. This softness makes me think of silks. Sit down to spin some silk tops with a nice glass of merlot.


This is not a complete list of course, there are so many wine types and so many fibre types it could turn into a book, don't even get me started on blends (both wine and fibre). Can you add a wine-fibre pairing to the list?
CABERNET

Tuesday, 3 January 2017

Keeping a happy cow


This is Reach; my house cow. She has been gone for many years now, but I still miss her.
It has been years since I had a house cow...and I still miss her. She was my friend and companion through many misty mornings and rainy afternoons. I have been seeing posts about the cruelty of the dairy industry lately on Facebook and other social media and while I agree wholeheartedly that the dairy industry is currently very cruel, I do not agree that we need to totally give up dairy foods (if you are lucky enough to be able to digest them). If you want to continue to eat dairy food but want to avoid the cruelty associated with it you have several options;


(Option A) If you have a few acres and an hour or so a day to spare, you can get your own cow (or goat, sheep or other lactating mammal) and have cruelty free milk, learn to make cheese and yogurt and enjoy the company of a truly amazing friend.

(Option B) Go dairy free...this is fairly easy, unless you are an avid cheese fan. I use plant milks a lot these days as I like the flavours and I have several friends who are vegan so having them on hand makes catering easier. There are dairy free cheeses and yogurts etc available too.

(Option C) See if you can source cruelty free dairy products in your local area. There are a few places which produce milk without taking the calves away from the mother or using other cruel practices such as artificial insemination or de-horning. Check out this Krishna dairy...

I unfortunately can't find my stash of photos showing my dairy cows. The cow in this photo was one I milked for a few years; her name was Beauty.

Many years ago I wrote an article for Grass Roots magazine about how to keep a happy house cow, I thought I would reproduce it here for your reference (just in case you want to try out option A). I have added a glossary at the bottom for those unfamiliar with farming jargon.

Bovine Motherhood
Keeping a milking cow is one of the most satisfying experiences in life in my humble opinion. Not only do they supply milk and keep the grass down, they also supply meat, in the form of calves, manure, food for guinea fowl (mine parade around a seated cow picking off ticks and lice), companionship and endless amusement.
Management of house cows is a tricky, much discussed subject (like climate change or the best way to peg out jeans) but surprisingly easy. All you need to do is keep in mind the needs of your cow. By needs I mean the  emotional or psychological needs rather than physical. There have been many wonderful books and articles written on the physical needs of cattle already; Keeping a house cow by Jim Wilson is one of my favorites.
Cows are motherly creatures; they live to fuss over a new calf, so don't deprive them of it. When your cow calves leave them alone for a week. This gives them the chance to get to know each other and gives the colostrum a chance to clear. Then bring them both in, she might be a bit reluctant to share her baby at first, food will help though. If your cow has been handled quietly and calmly  she will eventually allow you to handle her calf too.
 Most cows will have more than enough milk for you and the calf. Sometimes you can milk the cow while the calf runs around you both, I usually do this for the first two weeks, I just take out my bucket, stool and some hay, plonk them down by the cow and away I go. As the calf gets older you will have to lock it up for part of each day.
I have found that locking the calf up in the morning and milking in the afternoon works for me, but the other way around will work too, it just depends on whether you are a night owl or a morning person. Either way allow room for the calf to run and play and pasture for grazing in the calf pen. I leave our calf in the mesh lined cow paddock beside the house and turn the cow out to the larger part of the property to graze, that way I can keep an eye on the little...darling. I run a daycare center for my cows; they go off to graze while I watch the kids. Cattle in herds do this naturally, one or two cows can often be seen minding a mob of calves, sometimes an old bull will fill in too, while the mothers graze over the hill. Older daughters will help look after calves too, if you keep a heifer calf off your cow, she will take on some of the care of future calves.
While you milk, talk or sing to your cow. This may sound silly, but I've found it really does help to calm them, especially singing nursery rhythms. Maybe they are too busy giggling to worry about you playing with their udder, the rest of the family certainly are. Always remember to leave some milk for the calf after you milk, sucking of teats by the calf after you milk prevents mastitis and stimulates greater milk production.
 It also helps to have two cows in calf six months apart, so you can leave the cow to feed her calf at six months and still milk the other one. When your second cow is ready to milk you can simply swap them over, it is simplest to have them all running together. There is no need to fuss over weaning, most cows will wean their calves themselves about a month before they calve again, of course there is always the exception to the rule. Some cows like to keep their calves tied to their apron strings by feeding them into adulthood (they are so human) you may have to intervene here.
It seems to be a common misconception that you need to get 10-15 litres a day from your cow. Unless you have a huge family, or make cheese every day, you don't need that much, just take what you need. Cows will regulate their milk production to meet the demand, so the more you take the more she makes, but you will have to feed her more to keep her in good shape while she does it.
Using this method you can go away for a holiday or skip days, just leave the calf with the cow while you are away. I have left my cow out for a month, bought her back in and milked four litres off her the first day. Mostly the yield will drop, but it can be built back up within a few days with extra feeding and regular milking.
Cows also need company, of the bovine kind if possible. If you only have room for one cow and have no cow keeping neighbors, then maybe a goat would fit. Cows will make friends with almost anything and a goat is a good substitute as you can milk her while your cow is dried off. If the old girl is quiet you can go out and sit near her. Cows give off such a calm vibe they can soothe a troubled mind almost instantly. She will come to regard you as a kind of honorary calf, and as such as part of the herd.
This method probably sounds a bit erratic, but I assure you it has worked for me for eight years now. I have had no mastitis, fat calves and both I and my cows are happy. So good luck keeping a house cow, just remember; it's fun. 

Glossary
Calves- Calving refers to the process of giving birth for a cow. Also the plural of calf.
Colostrum- Colostrum is the substances all mammals produce immediately after giving birth which conveys immunity to disease and concentrated sugars, minerals and vitamins to the young. If calves don't get colostrum they will be thin, sickly and not unlike famine victims for their entire life.
Bring them both in- A phrase meaning to bring the animals closer to the main base of operations in order to handle them. Not related to spy craft in any way.
Heifer- A juvenile female bovine, or a teenage cow. Often seen to be overly concerned with grooming and the activities of the bull in the next paddock.
Mastitis- A bacterial infection in the udder, causing pain, swelling, pus and general crankiness in the cow and any other mammal unlucky enough to suffer from it.
In calf- Sort of like 'with child'. Farmers refer to a cow as being 'in calf' when she is pregnant, even though the calf is in her.
Weaning- When the calf is persuaded it doesn't need to feed from the mother any more. Usually cows will begin to wean their babies by moving away when they try to feed, if the calf doesn't get the hint she may try gently butting her calf with her head when they try to feed. If the calf is particularly persistent (or dim witted) she may kick him/her in the head every time they try to feed. If nothing else works I have seen cows outright attack their teen offspring to get the idea across.

Wednesday, 26 October 2016

Learning to make wine


Over the last three months or so I have been learning to make wine. Several people have expressed the opinion that my timing is not great; given that I am learning to drive at the same time. You don't have to worry yet though...wine making is a long, slow process.

Having always been interested in the process of fermented foods (or transformation in any guise really) I began by learning to make sourdough bread. This led to thinking about how wine is really just rotten fruit water (that tastes good) and how amazing that is. After a lot of reading on the internet and a visit to the local library I was ready to get fermenting.

Wine makers seem to range from those who elevate the process to an art or a science to those who accidentally left some juice out and found it had miraculously become wine by the time they got around to cleaning the kitchen. I figured that since we have been making the stuff for the last 6000 years or so, you probably don't need to build a lab to do it.

My first batch was apple cider, made from store bought apple juice (so I could get an understanding of the process). A demijohn (big glass bottle), some yeast, Campden tablets and a bung/airlock were duly ordered from an online shop and when they arrived I began the learning journey.

I didn't photograph that first batch (or the honey mead and the blueberry wine that came after) so I thought I would show you the process with a new batch (and because putting a new batch together is just so exciting I will take any excuse to make more wine). This batch is made from store bought juice again, I used grape juice with a little bit of apple thrown in for flavour.


The only immutable law in wine making is that everything (and I mean everything) has to be clean and sterile. I made up a sink full of sterilizing fluid by crushing two Campden tablets and dissolving them in water. I was a little worried about using sodium metabisulfite (which is a sulfur based material) in our system as anything designed to kill yeasts and bacteria will affect the health of soil and water. However the risks are very low when using it as infrequently as I do.

I didn't take a photo of the sink (you all know what that looks like). This is my beaten up pack of Campden tablets.


After everything is sterilized (equipment, counter tops, hands, stray pets) it is time to activate the yeast. This is just a matter of mixing the yeast with warm water and fruit juice in a cup and putting it somewhere it won't get spilled. Wine yeast is sold in neat little sachets containing dehydrated powder. When the yeast is mixed with liquid it starts to wake up and look for food, just what you want in a yeast.

My neat little yeast sachet and a bowl of apple juice and water.

This is the yeast when it is first mixed into the juice.

This is the yeast after about half an hour. Some is missing because I forgot to take a photo before beginning to pour it into the juice.


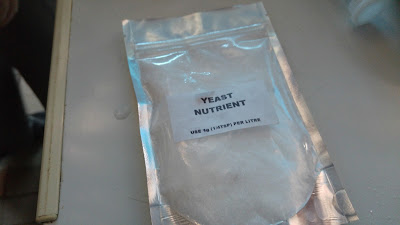
Next the juice (or fruit mush) is mixed with sugar in a pot on the stove, I used five cups of sugar in this batch. I heated the juice gently and stirred (not so gently) to dissolve all the sugar. When all the sugar was dissolved I poured the lot into a sterilized demijohn, added a teaspoon of yeast nutrient (don't ask me what that is, the books said I needed it) and popped on an airlock and bung.

Speaks for itself really.

 Most web sites recommend taking a specific gravity reading with a hydrometer before you pour in the yeast. I bought a hydrometer to do just that, then forgot to use it. Next time I will definitely do this though as it apparently gives you a better idea of how alcoholic the final product is. I guess for now I will have to rely on the tipsy test (you know...how many glasses does it take to make you tipsy).


The airlock and bung are the funny bits at the top of the big bottle. Airlocks let gas escape but don't let gas in.


 The general idea is to wait until the bubbling stops (between days and weeks) then rack the wine into a clean, sterile demijohn with a new sterilized airlock leaving behind the dead yeast (called lees) which forms a sludge in the bottom. I use a food grade hose (sterilized of course) to siphon out the good wine but leave the lees behind. The wine is left in this demijohn for another month or two until it is clear (apparently you should be able to read through the bottle) then bottled and stored for a further few months or years. After all that you can open a bottle and have a taste.

This is the batch, bubbling away producing alcohol.

My first batch of apple cider. I started it three months ago and opened my first bottle with a friend a week or so ago.

As you can see, the process of making wine is long and slow. The fact that it has taken so long to make and involved so much sterilizing, washing and general fiddling makes every bottle special. If someone gives you a bottle of home made wine they must really like you.

Wednesday, 28 September 2016

Learning to drive - Uh oh


As I am on the brink of becoming a teacher, I have had to learn to drive. Teachers need to be able to come to school early and stay late. I have always been against learning to drive; I'm not good at it and not being good at it can kill people (you can see my point). However, as it is now a necessity I have bought myself a little car (after much scrimping and saving) and got my Learner's permit.


So far I have learned that I will probably never enjoy driving, cars cost a lot and partners should not be allowed to give driving advice;

Enjoying driving (or not); Surely the piloting of multiple tonnes of metal and glass powered by semi controlled explosions in unpredictable circumstances where the risk of injury or death is ever present is not a relaxing pursuit? In fact it may even qualify as an extreme sport, reserved for adrenaline junkies and those with a death wish. Many people have told me they find driving relaxing, but I'm not one of them. For the first three and a half weeks I had a constant head ache as I would drive to the local town to catch the bus to work (while my partner took my fuel efficient car to work). Driving in the morning resulted in sweaty palms and tense muscles (hence the head ache). Now I am slightly more relaxed and the head aches have passed but I am still very nervous and do not enjoy the responsibility.

Cars cost a lot; The little car I bought is twenty years old and had never been out of town. It must have been a surprise to have to go back to work in the retirement years. So far the shock absorbers (which were original) and two tires have had to be replaced. This is an expensive exercise. Having two cars also means we have two registrations, two insurances and more fuel. All so I can get to work, where I will need to earn more and work longer hours to afford the car that gets me to work (small pointless circles).

Partner/driving instructor; While my partner is a very patient man (well...he would have to be wouldn't he), he has some major flaws as a driving instructor. Firstly there is his non-verbal nature; he doesn't instruct much and uses body language instead, for example he indicates my closeness to the outside edge of the road by lifting his left leg slightly and leaning towards me. This has obvious disadvantages; I can't always be aware of his body language and piloting the car at the same time.

Secondly, he has a habit of fiddling with the buttons on my side of the car. It is very disconcerting to have the windscreen wipers flicked on while you are driving or the overdrive button pressed unexpectedly. I have now confined his area of influence to the stereo and the air conditioning while I am driving.

Thirdly, the car has become a cold war between us. Kev' likes my little car, it's good to drive, fuel efficient and reliable (mostly) so he wants to drive it all the time. His car is at the car hospital with undiagnosed pains in the fuel system and has been there for two months. Kev' shows no signs of picking it up any time soon. His work gear takes up the back seat of my car and the multitude of tools in the back is growing. He is staking his territory. To counteract this I have installed a square, dangly car scent that is so feminine it even smells pink, put on CWA and Wiccan bumper stickers and left the fairy sticker and little horns on the logo that the car came with. I am thinking of naming the car Io as my daughter says it should have a cow's name (being a Toyota) and suggested either Hathor or Daisy. Io is a much better choice as she was a Greek girl who found herself unexpectedly turned into a demi god and she traveled a lot.


I am glad to be learning a new skill, even one that I don't enjoy. I do wish that it wasn't a requirement of my working life though.

Wednesday, 21 September 2016

Making papercrete - Yet another way to use rubbish

Over this winter I have noticed a breeze blowing through the gap in our lounge room floor; the difference in height between the tyre floor and the pavers. This sneaky little breeze makes my feet cold while I spin (and I'm obviously metamorphosing into a cranky old lady) so I decided to try to block off this gap.
Enter the idea of papercrete; I have newspaper in abundance so it seemed a natural progression to mix up some papercrete and plug the gap with it. Papercrete is made by mixing newspaper soaked in water with concrete. The similarity between the recommended procedure and what I did ends there.


This is the gap I hope to fill. In addition to a sneaky breeze this gap also lets in antechinus, snakes and allows dropped cutlery to escape into the wild.

The recommended procedure says to soak the paper in a tow mixer designed to shred the softened paper and mix in the cement.

I shredded my paper...well ripped it up small, and soaked it in water in a bucket
 I was only doing a small test patch to see if it will work so I began by tearing up a bucket full of newspaper. The paper soaked for a week so it was good and soft.

I used a half bag of cement mix I had in the shed.

I added the whole half bag of cement...forgetting to pour off the extra water.

I mixed the lot into a sloppy slurry and began to pack it into the gap. The bucket full of goop went further than I thought it would, but it is still very rough and I think it will crack when it dries.

The filled up gap

As you can see it's rough.

While this was a very quick and dirty experiment I can see a lot of potential for this building material. If the papercrete holds in this gap I am thinking of using it to fill the gaps and cracks around doors and windows. I might even go as far as building a tow mixer to make HUGE batches as I am lucky enough to have access to almost unlimited newspaper.

 In other news...I went on a little field trip to the Museum of Contemporary Art in Brisbane last weekend and found this amazing piece there. It reminds me of the tumors that grow on really old gum trees.


Saturday, 23 July 2016

The fire wood cycle at the humpy

Our cooking stove and house and water heater.

Sitting by the fire on a cold winter's night is so pleasant isn't it? I love to sit and knit or spin by the fire when the day's work is done. Our stove is a third hand wood heater we inherited from my partner's parents during a shed clean up. It had fallen off the back of a truck (literally, not figuratively) and had a crack in the corner. We took it home, got a new flue piece made up (by a local engineering genius) and put it in the humpy. That was five or six years ago, it has never given us any trouble and if fed right stays alight from about June until September.

The fire gives us heat for our home, hot water from the eternal boiler on the top of it and a stove to cook on. All it asks in return is a steady flow of wood. We are lucky to own enough land to supply our firewood needs, in fact harvesting wood in the form of fallen branches and logs is part of our fire safety plan.

Fallen branches and dead trees are a bit of a fire hazard close to the humpy. Sparks from piles of burning wood can drift into the humpy via a multitude of gaps and holes, setting the whole place alight. The usual solution is to burn off; set sections of land alight and control the burn, removing fuel from the area. To me it always seemed sort of counter-intuitive to say to yourself "Hmm, that looks like it might burn....could be dangerous....I'd better set it alight", not to mention the multitude of small reptiles coming out of torpor and the tiny birds with nests in the grass who have their first batch of babies for the year in the early spring (when most people burn off). Our solution is to collect as much of this fuel as we can as fire wood within a 50 meter (about 50 meter) radius of the humpy. We don't collect wood from the whole property as a lot of birds and animals use fallen branches and logs as homes. In fact the Bush Stone Curlew has been driven almost to extinction by people who are too neat as they use tangles of fallen branches to nest in and their breeding has dropped due to lack of nesting sites and cover for foraging.

Anyone who lives in the bush will tell you that wood lying on the ground will absorb water and not burn well and that a lot of types of wood (tree species) are no good for firewood. This is unfortunately true, the usual solution is to fell a standing dead tree. Large dead trees, and sometimes small ones too, are generally homes to possums, gliders, birds and insects so we try not to cut down standing trees very often. However, because the wood we gather from the ground is sometimes damp or does not burn hot enough, we sometimes cut down small standing dead trees to mix with it. We choose very small standing trees and check them for life as best we can before cutting them down.

Cutting down a small dead tree

Cutting the tree up into chunks or rounds

We bring it all home in the trusty farm trailer

Then wheelbarrow it to the house

and stack it by the fire

All to keep the dogs warm
While collecting firewood may seem like a simple weekly task, it actually has a lot of considerations attached to it (for us at least). We try not to disrupt the ecosystem of our property while carrying out our daily life, we try to minimise the dangers inherent in living in the bush and we try to make the best use of our resources. These concerns are sometimes in conflict and compromises have to be made. Do you collect firewood? What are your considerations?