CSG, LPG, LNG, and Deliberate Attempts to Confuse the Issue
Linda Woodrow is one of my favorite bloggers, and she makes sense. Have a read.
Wednesday 23 October 2013
Friday 18 October 2013
Salmon faverolles chicks at last
My chook flock tends to be very eclectic; I gather unwanted chooks of all breeds who tend to have chicks of unknown parentage. We haven't had many new editions lately, so I bought a dozen fertile eggs (from my friend Milton) to set under a clucky hen. The new chicks are Salmon Faverolles; reputed to be quiet (not noisy) and docile (very dumb and trusting).
 |
| What beautiful babies they are. |
They hatched a week ago and I am in love.

They are very quiet; I can barely hear them cheeping in the pen, and very docile; they don't get out of the way when I take food in to them. They have cute little fluffy bodies and a bouffant hair style to go with it.

I will be keeping a rooster and some hens from this lot and taking a rooster and two hens to school for the kids to look after too. I may need to build a separate pen for them though as I think my wild, feral flock would be too rough on them (they really are very trusting and dumb).


Fulled knit bags for the markets
I have been making knitted and fulled bags to sell at the markets. They are so much fun to make and each one is unique. I thought I would share one of the patterns I use.
 |
| This is the first fulled bag I made. |
I knit on the bus on the way to and from work and at lunch time, and I spin in the evening when I sit down, but I don't seem to be able to spin fast enough to keep up with my knitting. Instead I buy pure (and non-super washed) wool from second hand shops whenever I see it and use it to knit these bags.
 |
| This one is for the markets. |
The pattern I would like to share today is one I have just finished knitting. As usual, I have complicated the process; I used the Petite Felted Bag pattern by Ann Linn to get the shape of the bag and the mosaic/ slip stitch pattern from the Asthore bag by Christi Wasson for the pattern.
 |
| This is the bag before fulling. |
I really enjoy knitting; it keeps my hands busy so my mind can wander. Making something useful is always a pleasure too. I am setting my goal at about six fulled bags by December, so I can take them to a market somewhere and make enough to buy more wool.
 |
| Another pattern, unfulled as yet |
 |
| A finished bag for the markets |
Saturday 12 October 2013
Eco bricks; Making use of rubbish
Lately I have been thinking about rubbish; specifically the plastic and foil bits that seem to be wrapped around everything these days. We have no rubbish pick up here. No magic bin that mysteriously empties itself if I leave it by the road on a Tuesday night. We take our rubbish to the dump in the trailer and pay for the privilege of leaving it there (we also pay $150 a year to maintain the local dump on our rates). So I have started to think about ways to reduce our rubbish production.
We buy in bulk where we can and I send refillable containers to the local co-operative to be filled up with washing powder and detergent. Glass, recyclable plastic containers, aluminium and tin cans are taken to a recycling centre periodically. Food scraps, paper and cardboard are used in the chook pen for composting. That only leaves that annoying plastic; plastic wrap, Styrofoam trays, chip packets, chocolate wrappers and plastic bags. We commonly fill about one grain bag (20 litre size) per week of non-recyclable plastic.
I think I have found a solution at last;
Eco bricks. They have been used to build schools and houses in third world countries for a few years now and provide a handy way of getting rid of rubbish that would otherwise go into landfill.
Basically they involve stuffing clean plastic rubbish really tightly into PET bottles until they are full and hard, then put the cap back on. I have been making them for about two months now and have managed to produce about two a week. I never thought I would be thankful for my partner's coca cola habit, but he manages to provide just enough bottles to keep up with the plastic we produce.
Maybe I will collect enough to build the toilet out of them.......
Is this idea too crazy?? Can I get the local council to approve? What do you think?
We buy in bulk where we can and I send refillable containers to the local co-operative to be filled up with washing powder and detergent. Glass, recyclable plastic containers, aluminium and tin cans are taken to a recycling centre periodically. Food scraps, paper and cardboard are used in the chook pen for composting. That only leaves that annoying plastic; plastic wrap, Styrofoam trays, chip packets, chocolate wrappers and plastic bags. We commonly fill about one grain bag (20 litre size) per week of non-recyclable plastic.
I think I have found a solution at last;
Eco bricks. They have been used to build schools and houses in third world countries for a few years now and provide a handy way of getting rid of rubbish that would otherwise go into landfill.
Basically they involve stuffing clean plastic rubbish really tightly into PET bottles until they are full and hard, then put the cap back on. I have been making them for about two months now and have managed to produce about two a week. I never thought I would be thankful for my partner's coca cola habit, but he manages to provide just enough bottles to keep up with the plastic we produce.
 |
| Step one; collect all the clean plastic rubbish you can (wash it if you have to) |
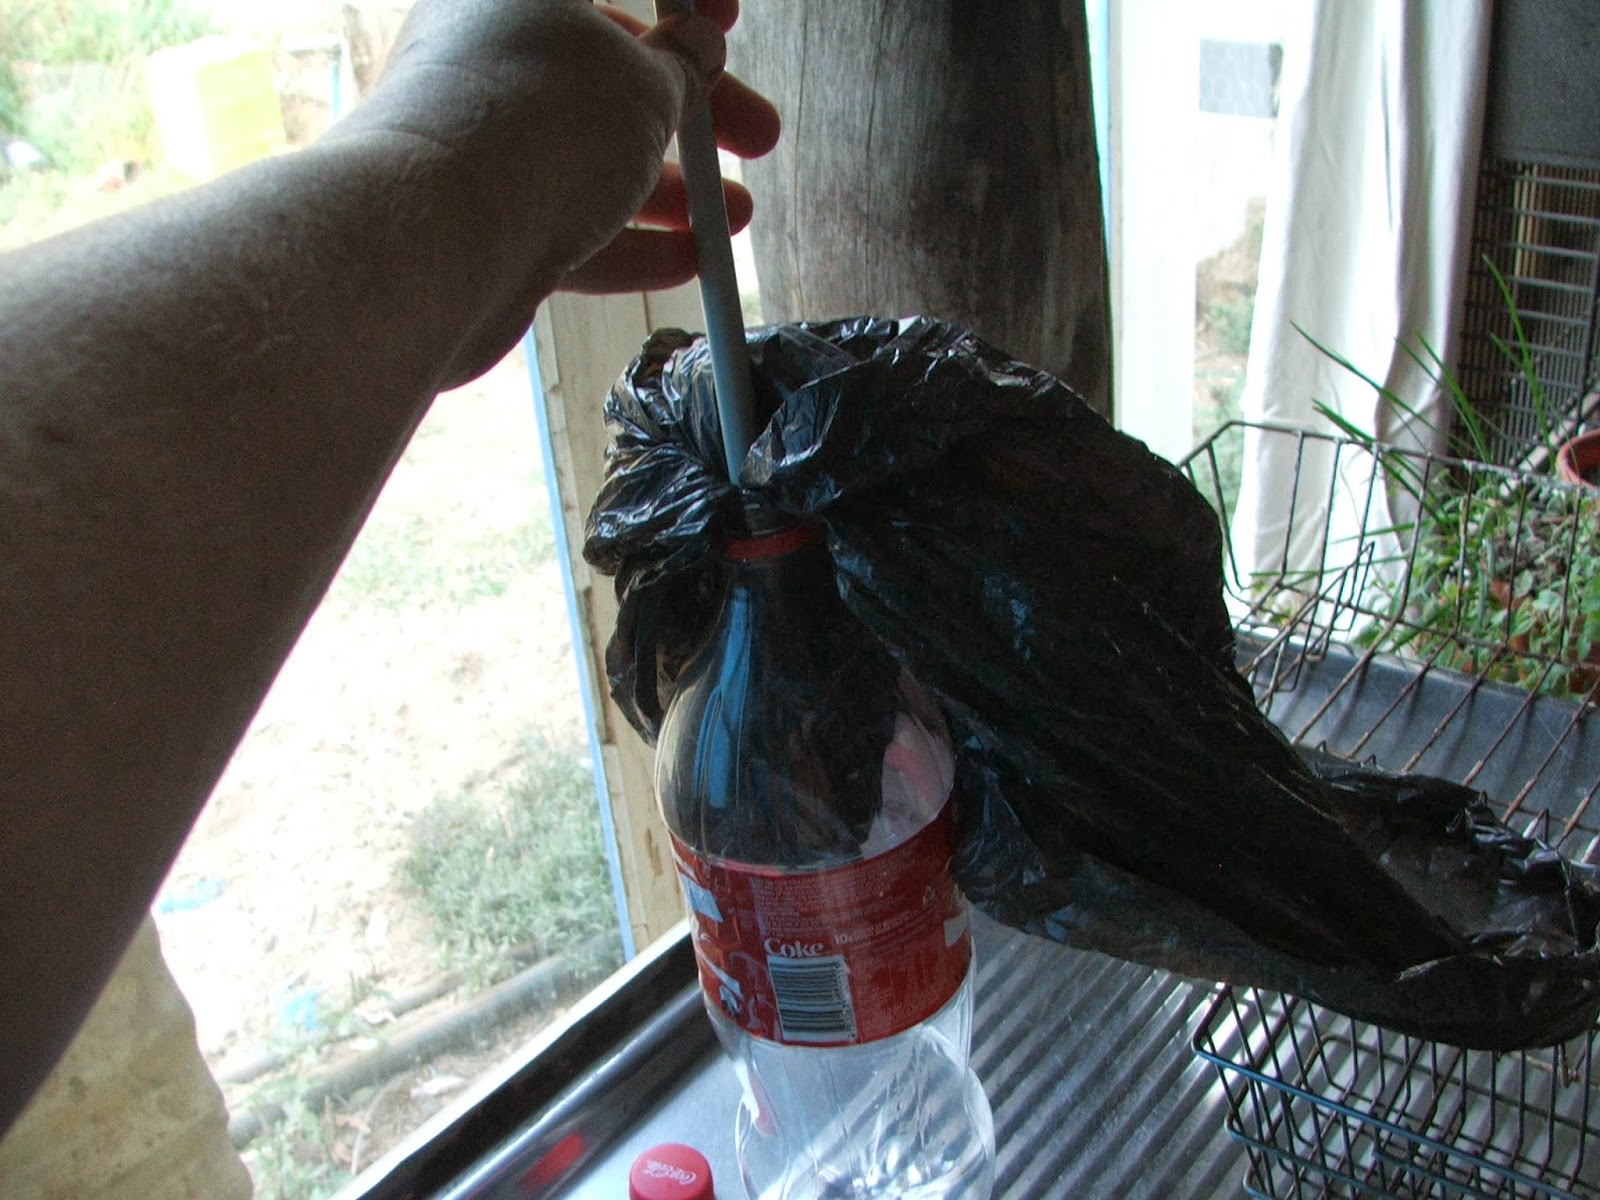 |
Step two; using a stick or an old knitting needle, shove the plastic rubbish down into the bottle. |
 |
| Keep filling until you can't jam any more in, then put the cap back on. |
 |
| Stock pile them somewhere and use them to build. |
 |
| Beautiful buildings like this. |
Maybe I will collect enough to build the toilet out of them.......
Is this idea too crazy?? Can I get the local council to approve? What do you think?
Monday 7 October 2013
Dry days of spring and Hugelkultur update number two
The hot, dry, windy months of spring are here. I am using lots of water on the garden and there is no rain in sight to refill the tanks. I water the garden with the water from the washing (about 160 litres a week) and from the chook and sheep water buckets when I refill them (about 30 litres); I also use about 20 litres a day straight from the tank to water the seedlings and potted plants. I am happy to be re-using the water from the washing and animal waters but I think I need to start putting a plug in the bath when we shower too, so I can scoop it out and water more. This drying wind really affects the vegetables.
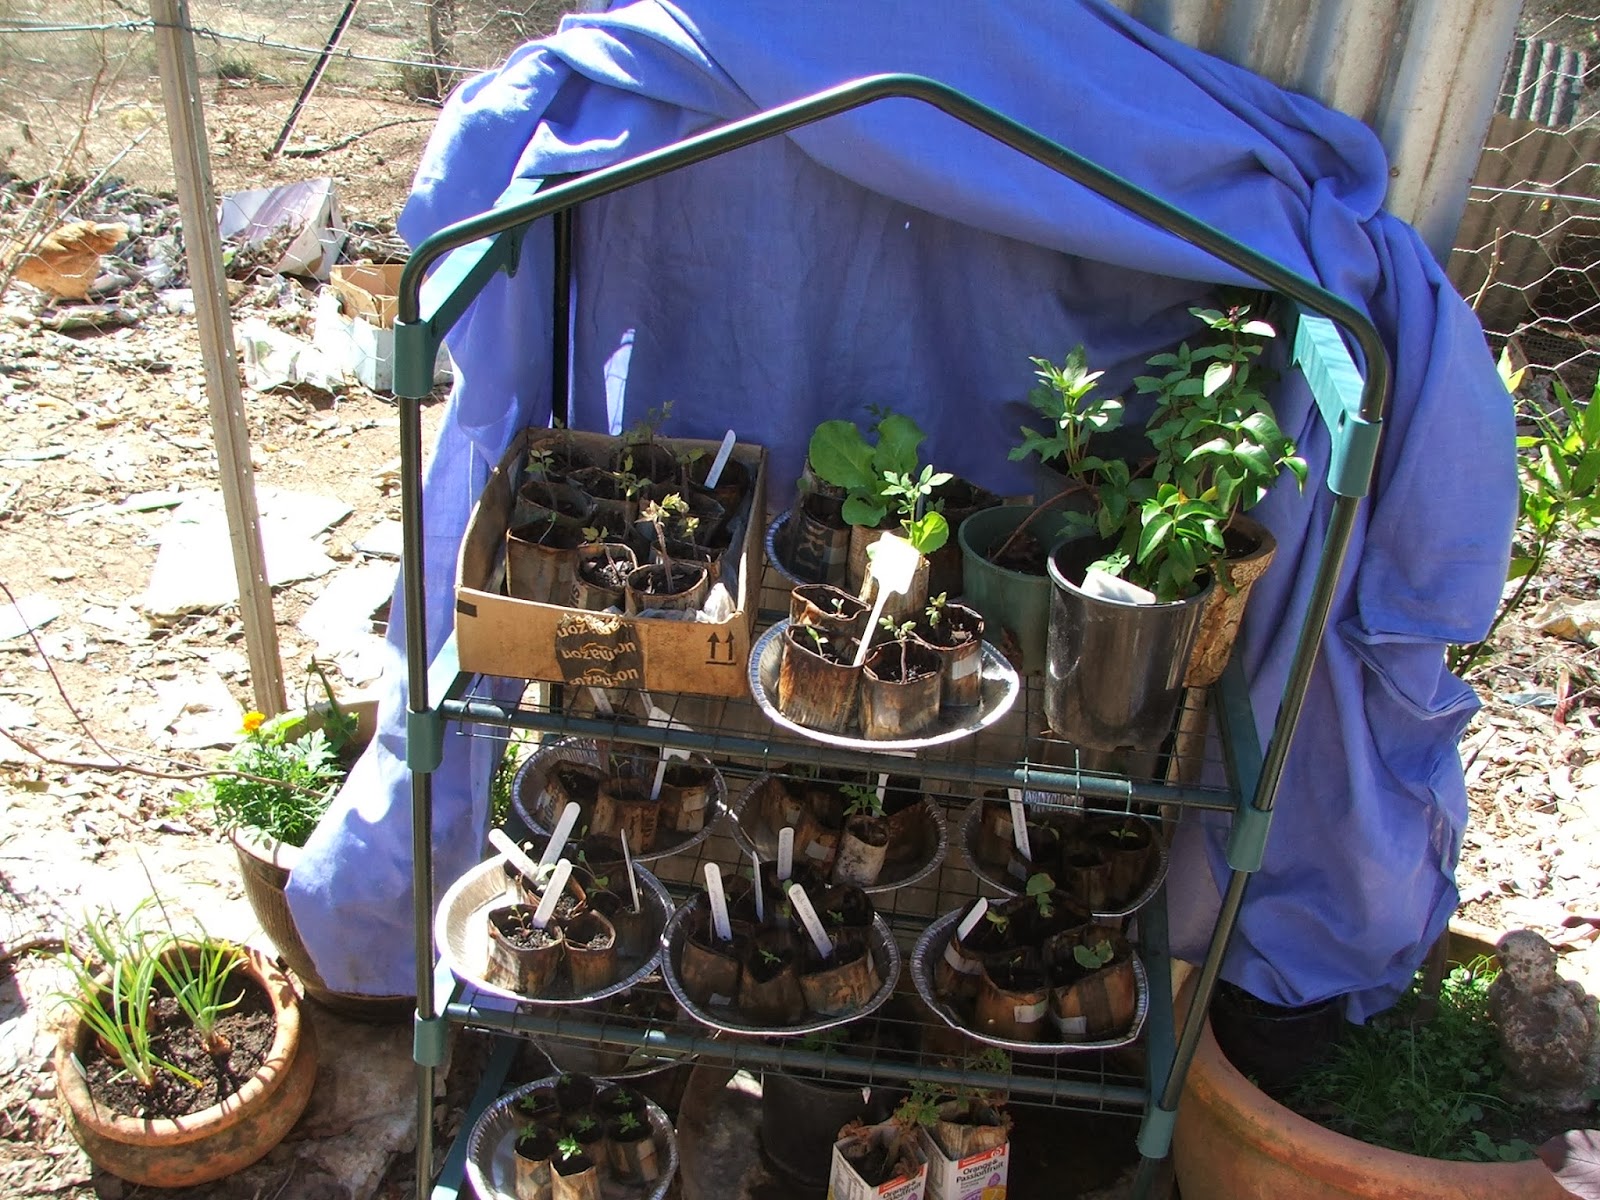
In an effort to save my seedlings and tender plants, I have been covering the seedling hardening off area with old sheets to conserve water and provide a little shade.
 |
| My seedling raising area. |
 |
| Happy seedlings in pie trays to give them time to soak up the sprinkle I give them every day. |
In the Hugelkultur beds everything is growing well. I still only water these beds once a week with the washing water (about 80 litres). This bed badly needs re-mulching to further conserve water (that is my goal for this week).
 |
| I know it looks dry, but the soil under the plants stays reasonably damp. |
In the hugelkultur beds I have......
 |
| zuchinni |
 |
| Roma tomato, just little fruit at present. |
 |
| Cabbage |
 |
| brocolli, just starting to bud. |
 |
| And good old silver beet. |
 |
| The trailer bed has broad beans and some really late snow peas; so I covered it to provide some protection from wind and sun. We might get lucky and get a crop. |
 |
| The heirloom lettuce in the trailer bed is going well and we eat off it every day. |
 |
| We are looking forward to beetroot soon, but in the meantime the leaves are added to stir fry and salad (when my partner isn't looking) |
Saturday 28 September 2013
Passing of Ryan Rooster
Today is a sad day; my favorite rooster died last night. He was a cross bred frizzle rooster, his mother's name was Eagle and his father was Raoul; he looked just like his dad.
He was an old boy for a rooster; five years at least, but I kept him because he had beautiful babies and because he was a gentle, caring boy, good with chicks and hens and people of all heights and shapes.
As is the way with these things he got into a fight with one of his grand sons and lost the fight. He was in intensive care overnight, but the hot day and his advanced age did him in.
I will miss him.
I am looking for homes for some of Ryan's grandsons as I am going to have a Salmon Faverolles rooster next I think;


Some good news for the day;
I have one little Minorca chick hatched! They are so cute; with their short little beaks and big eyes.
He was an old boy for a rooster; five years at least, but I kept him because he had beautiful babies and because he was a gentle, caring boy, good with chicks and hens and people of all heights and shapes.
As is the way with these things he got into a fight with one of his grand sons and lost the fight. He was in intensive care overnight, but the hot day and his advanced age did him in.
I will miss him.
 |
| Ryan Rooster a month ago. |
I am looking for homes for some of Ryan's grandsons as I am going to have a Salmon Faverolles rooster next I think;


 |
| This little boy is still waiting for his adult feathers, but he will be steel grey I think and a full frizzle look. |

Some good news for the day;
I have one little Minorca chick hatched! They are so cute; with their short little beaks and big eyes.
 |
| The Minorca is the one with her face away from the camera (of course) |
 |
| So beautiful, I love baby chickens. |
Friday 27 September 2013
Carrot towers; an experiment in intensive growing
My little Purple Dragon carrot seedlings are growing up so fast so I thought it was time to start experimenting with ways to grow them.
We have no topsoil here at all (well a few centimeters in some places) so I have been thinking about raised beds for carrots for a while, then I came across this idea, called a flower tower and thought "Why not try it with carrots?"
 |
| As you can see, I built the frame as per instructions (see the 'flower tower' link) |
 |
| Then I found a stray piece of PVC pipe and thought it would make a good water delivery system. |
 |
| So out came my trusty drill |
 |
| Dozens of holes were randomly drilled all over. I also plugged one end with a sink plug. |
 |
| The pipe went into the middle of my frame, plugged end down. |
 |
| Then I filled the lot with potting mix and compost. |

 |
| I also added some PVC pipes through the bottom, sticking out about 25cm, to provide supports for the cover. |
 |
| The seedlings were poked through the shade cloth into the potting mix. A job which took ages. |
 |
| I planted a tomato and a love-in-a-mist in the top to provide colour and shade to the carrots (and maybe even tomatoes) |
 |
| And marigolds around the base, for companion planting and for more colour. |
 |
| The wire cover went over the whole lot and the seedlings watered in |
 |
| Then I added an old sheet over the cover because it's a windy, hot day and the little seedlings need all the cover they can get for a few days. |
The result so far is a mysterious, sheet covered mound. I have some concerns about this method;
If the carrots grow straight down, will I be able to harvest them?
Will I be able to keep the water up to them?
It is a time consuming business, putting the carrots through the shade cloth, is the yield worth the time?
I only planted 10 carrots in the tower as a trial run, but if it works there is room for 50 in just this little tower so the method certainly is space saving.
I will keep you posted on the progress of this experiment.
Subscribe to:
Posts (Atom)