Showing posts with label spinning. Show all posts

Thursday 5 October 2017

Producing peace silk- the moths are emerging


After only two weeks of cocooning the moths are beginning to emerge. At the point of writing this I have two male moths with many more to come. Males are easy to identify because they have well formed wings and smaller bellies, they also hold their bottoms in the air and flutter their wings regularly to attract females (they make a sort of twerking motion with their bottoms too). At this point I am just trying to keep the remaining worms fed and find a place for the emerging moths, but I did find I couldn't resist processing just two of the now empty cocoons.

This is the hole in the end of the cocoon  made by the emerging moth

Many more cocoons waiting to be emptied.

I got so excited that I didn't take photos, so words will have to do.
First I made sure the cocoons were empty by checking for the hole in the end. Then I heated some water on the stove in an old saucepan. I added a teaspoon of my home made laundry gel (more on this recipe at a later date) which is basically pure soap and washing soda with a few drops of eucalyptus oil. The teaspoon was more than enough for my two cocoons, I will add more cocoons to the next lot I  process.
I let them simmer on  the stove for half an  hour (alongside the steaming veges for tea) then turned the heat off and let the water cool until I could reach in and scoop out the mass of silk. The two cocoons turned into a mass of tangled fibre in no time. Next I rinsed this mass under the tap until all the gel was removed and the yellow colouring had left the strands, I also picked out the left over skin and stuff from the cocoons at the same time. I haven't organised a frame to stretch the cocoons onto yet so I just spread the fibre out as best I could and left it on the sink drainer to dry.
When it was dry and a bit fluffy I took the opportunity to admire my first bit of peace silk fibre. Then I wacked the little mass on the carders and carded away for a few minutes until I had a passable rolag.

My first silk rolag

A close up of the fibre
Of course my moths are now busy mating and laying eggs for next year.

Next years silk worms.

The whole silkworm story is fascinating; from the huge effect silk has had on world trade, politics and even exploration to the interesting fact that there are at least three genus of silk moth and not all of them eat mulberries and the many myths surrounding the discovery and production of silk.

Here is an interesting article about the effect silk had on world trade in history.

I am finding this journey of discovery very interesting; silk is an amazingly beautiful fibre and like all fibre sources it requires a bank of specialised skills and knowledge to produce. There is so much more left to learn. Once all my moths have emerged and lay eggs I will be experimenting with processing the cocoons, I might even try to unravel some hatched cocoons in the traditional manner and see why it's not considered to be viable.

Friday 15 September 2017

Producing peace silk- from eggs to hankies


Lately I have been thinking about learning to spin silk. I bought myself a small lot of beautiful roving and spun it up on my wheel. It was smooth and easy  to spin, it produced a gorgeous, lustrous yarn that took the bright orange dye so well it looked almost glowing. So I decided that silk is my new love (when it comes to fibre) and ordered some cheaper silk hankies, because the roving is anything but cheap.
Me being me, I wanted to do the whole process from scratch, not just buy roving and spin it. I want to be the whole machine, not just a cog in it. First I had to find out the details...

I did my usual research and read heaps of books and articles, watched how-to videos and discovered that the beautiful roving I so badly wanted to make came with a price even bigger than money; the pupa are boiled alive so they don't damage the cocoons when they emerge as moths.That put me off the whole deal, until I discovered that there is a movement called 'peace silk' who's practitioners let every moth hatch and process the cocoons into silk hankies or slubby (rough) roving.
While the peace silk method does sound better as it doesn't involve boiling babies it does leave me with another quandary; what to do with all those eggs. If every female moth mates and lays up to 500 eggs, then those eggs will either need to be destroyed or given away. I thought long and hard on the subject and decided that letting the moths emerge and lay eggs then destroying the eggs is more ethical as science does not consider eggs as living things (they are considered to be non-living things with the potential for life) although there is a lot of contention about this classification. Maybe this train of thought is just hair splitting, but I have to form an opinion one way or the other in order to proceed. Who knows, a better method may present itself in the future.

I found a listing on Gum tree for free silkworm eggs so my silkworm adventure began. The eggs came in the mail and as it had been a warm few days they immediately began to hatch. Luckily I had also ordered some silkworm chow (dehydrated mulberry leaf mush) as our mulberry tree was only just beginning to put on leaf. I made up some of the chow and fed the early arrivals.

The new babies are so tiny they are hard to see.
They grew fast, eating day and night until they were in danger of exploding out of their little box. When my tree had full leaf I began to feed them real leaves instead of the mush, they loved it and grew even faster. I found that the worms are more active and healthy when they eat leaves. So began a period of feeding twice a day on a big pile of mulberry leaves.

As you can see there are different ages in this lot. The eggs took a total of two weeks to hatch.

They are voracious eaters


Just when I was congratulating myself on keeping them all going...disaster struck. Stray cattle ate my mulberry tree down to the bare branches (including a very promising crop of fruit). Which left me begging friends and neighbors for leaves from their trees. Luckily this stage is almost at an end as my poor tree is growing more leaves. The worms eat about a shopping bag full of leaves per day, which is not small amount. I think I will have to plant a few more trees to keep up next year.

Some worms began making silk about eight weeks after the first hatching, this is a very long time to stay worms and I can only guess at the cause. Apparently the worms should start to spin after four weeks (or there about), but not having enough to eat and or colder weather can slow down the process. Maybe the silkworm chow was not enough for them, or maybe the weather was too cold. Possibly they have been bred to be worms for longer as they are now considered as pets by some people. Either way, they have begun to spin cocoons, so I built a spinning retreat for them.

My spinning retreat box. The toilet rolls are perfect for worms to spin in.

New residents getting ready to spin.

One worm decided to spin in an already occupied tube, but it's best not to disturb them once they start to spin.

You can see the sheen on the cocoons

The sheen or glow stays with the yarn


I don't know why my worms spin yellow cocoons, but apparently it washes out.
So far the silk making adventure has been fun and very satisfying. Once the cocoons hatch and I can process them the learning will really begin.

Thursday 13 April 2017

Making resin drop spindles

I have been wanting to try molded resin for quite a while now; I see all those gorgeous You Tube videos about embedding wood or flowers or dead butterflies in resin and it gets my creative nature going. So off I went to order some resin online...

I did the usual internet search for tutorials and such, You Turn TV had the best information and explanations I could find about how to choose, mix and embed items in resin. Armed with this information, my resin kit, a few molds I bought on a whim on Ebay and piles of otherwise useless junk from around the house I set about making some resin stuff...

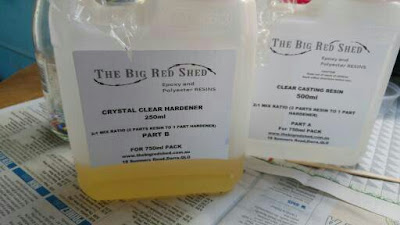
The resin and hardener that came in my kit.

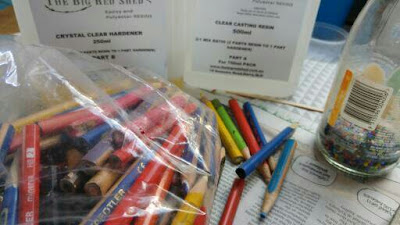
Too short pencils, beads and glitter, my test embedding materials.

Resins all have a two part mixing system; you add a chemical hardener to a resin base to make a liquid which will harden to a solid over time. The time it takes to harden varies wildly due to resin type (there are three main types), brand (many, many brands) the weather (faster setting in hot weather) and quite possibly the way you hold your mouth while mixing it (from my own experiments). My kit said to mix two parts resin with one part hardener, all the kits I looked at had a different ratio or measurement method; some measured by volume, some by weight, the one I bought measured by volume so it was easy to do. Epoxy resin (which is the kit I bought), has a long pot life, meaning it takes a while to harden once the resin and hardener are mixed together, this allows me to fuss around with it quite a bit.

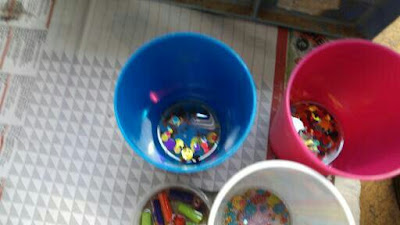
My first step was to find a few molds to hold the resin while it sets. I had a couple of pendent molds and a set of ring molds that I bought on a whim so I dug those out of the overflowing craft room. I also found some round takeaway containers that had formerly held tartar sauce; these little beauties sparked the idea of making spindle whorls because they were exactly the right size and depth. So I now had a project in mind...resin drop spindles.

Second step was to prepare all the junk to be embedded, I just cut up some pencil stubs and mixed some glitter and stuff. I collect the pencil stubs from work (schools use a huge number of pencils every year and when they are too short to be sharpened again they are thrown out, unless I'm there), the glitter and bits were saved from craft activities I had done with my daughters in the past. I then mixed up my resin and hardener; this took a while as you have to make sure the two are well combined then wait for the bubbles to clear, it took about five minutes to do this part.

Third step was to pour the resin into the molds with the embeds in them. I made some spindle whorls with pencil stubs, glitter and beads in them.

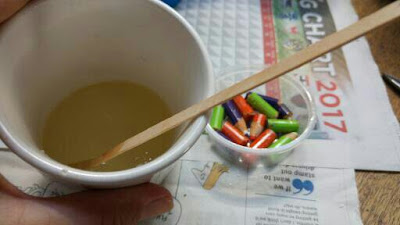
That is one of the little takeaway pot filled with pencil stubs beside my resin ready to be poured.

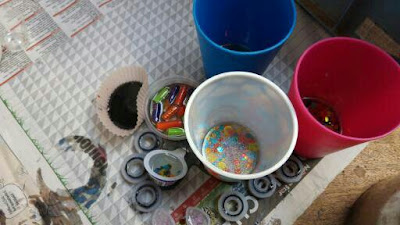
Some filled molds, yes I did spill some resin and make a HUGE mess of the table. The little round things are the ring molds.

I tried the bottoms of plastic cups as molds too.

 The next morning....after the resin had all set I took everything out of the molds. Only breaking one whorl in the process. I also scrapped up all the bits of resin left sticking to the table after I spilled one of the molds. It had embedded the newspaper onto the table top (luckily nobody here notices a new scar on the table) but it peeled off eventually. I ended up with three usable whorls, five rings and a couple of pendents.

I borrowed my partner's drill and drilled some holes in what I thought was the middle of the whorls. As it turns out they are all slightly off center due to my poor measuring skills, but that has worked to my advantage as the finished drop spindles keep spinning for much longer than my more balanced ones (that was a happy accident). I stuck some dowel through the holes and screwed in a tiny little cup hook at the end, I also strung them up with a leader thread so I could test them.

All the pieces I made had to be sanded down to get rid of any sharp edges or lumpy bits, but it didn't take too long. I just used the sanding attachment on the drill.

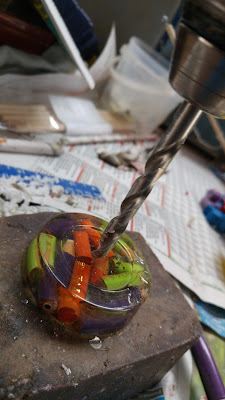
Drilling a hole in the whorl

 They work really well and look kind of pretty too (at least I think so). I will be selling these little spindles at the next market stall, or maybe on Etsy. Making resin whorls was so much fun I just might include it on my list of permanent craft activities. It uses up all those little bits and pieces of stuff that I seem to collect, like too short pencils and a half cup of mixed glitter. It makes a surprisingly beautiful whorl for a drop spindle and it's a lot of fun...on the down side though, it can make a mess, it's basically plastic and needs constant purchases of resin and hardener. Still...it is a lot of fun.


What do you think?
I will post pictures of the rings I am making in another post. I'm trying to figure out how to embed fabric scraps and feathers into rings and bangles.

Thursday 12 January 2017

Matching the wine to the fibre

Recently while wandering about in Etsy (in a cyber sense), I found a shop that sell wine holders for spinning wheels. I immediately wanted one of course, given that I have recently learned to make wine and I love spinning it seemed a perfect match.

I know it's not a wine glass, but one would fit in the holder.


That started me thinking about matching wines to fibre types. We match wine to our meals, why not other sensory feasts? I thought about it for a while and came up with the following list. You may find it useful if you purchase one of those wine glass holder things for your spinning wheel.

Chardonnay- One of the most common white wines, chardonnay should taste oaky, fruity and have a velvety feel in the mouth. This sounds like good old merino to me. Match your chardonnay glass with some hand dyed merino tops for spinning and you have the perfect spinning binge.

Pinot noir- This is a light red wine which is fairly common, it should be high acid, low tannin and taste of fruits and roses. One of it's defining characteristics is it is hard to make and is very easy to get wrong. This one sounds like cotton to me; both are difficult to get right and require exacting concentration. Spin up some naturally coloured cotton with a glass of pinot noir and see if I'm right.

Shiraz- This is one of the strong flavoured red wines, it should taste of peppers, cherries and maybe chocolate. It is known as a very long lasting wine as it remains stable and drinkable in a wide variety of conditions. Because it is such a strong, opinionated wine I think it would go well with border Leicester wool as both are strong, hard wearing and lustrous.

Riesling- This light flavoured white wine should taste of fruit and be generally sweet. Riesling is a high acid white wine making it long lasting, meaning it can be aged for a long time and still be drinkable. This quality makes me think of flax which is spun into the long lasting linen yarn. Linen also improves with age and is both sweet and crisp. 

Cabernet Sauvignon- This strong flavoured, high alcohol wine is one of the most common reds around, it should taste of vanilla and red currants. It is a very long lived wine and can be aged for centuries. This wine pairs very well with Lincoln longwool fleece which can also last for centuries in the right conditions. Grab a bottle of cab' sav' and some lincoln longwool fleece and get spinning.

Merlot-  This (relatively) light flavoured red wine is said to have a plum and herb aftertaste. It's low tannin makes it easy and soft to drink. This softness makes me think of silks. Sit down to spin some silk tops with a nice glass of merlot.


This is not a complete list of course, there are so many wine types and so many fibre types it could turn into a book, don't even get me started on blends (both wine and fibre). Can you add a wine-fibre pairing to the list?
CABERNET

Saturday 23 April 2016

Hawser ply yarn- An accidental discovery

Sometimes happy accidents happen, and this is one of them.
I am currently completing the last two units of a Bachelor of Education (primary), these last two units are hard and require a lot of brain space. I usually spin, weave or knit in the evenings (after a long day at the computer) to relax and do something productive. So last week I decided to try a new plying method for making fingering weight yarn (plying is when you twist two strands together to make a stronger and thicker yarn). The usual method is to spin singles in a clockwise direction and then ply two together in an anticlockwise direction. My new method involved winding the singles into a centre pull ball and plying in the usual anticlockwise direction from both ends of it to make a two ply yarn.
This time I was distracted by thinking about my current assignment (teaching fractions) and plied the whole 100 g of singles in a clockwise direction (without even noticing; yes I was that distracted). The result was a really twisty yarn that could not be used for anything and looked sort of wrong. So I went looking for advice on the internet (as I always do) and found that other people have made the same mistake (unsurprising really) and decided they liked it better that way. This plying method is called Hawser ply and it is used to make super stretchy yarn for knitting cuffs on sleeves, socks and hats. The catch was that I had to make another 100 g of clockwise plyed yarn then ply them both together in a clockwise direction.

The first skein of twisty yarn.
 I found some great tips and pointers in a The Spinners Book of Yarn Designs; keep the yarn tight while it is plied and give it a good hot wash when it's done.

Two balls of mistake yarn ready to ply up. You can see how twisty it is.

After I made my mistake yarn again (on purpose this time) I plied them together in the recommended anti-clockwise direction and got a very stretchy DK weight yarn. I can't wait to knit something up with it now to see if it does make better cuffs.


Hawser yarn on the swift

The finished Hawser plyed yarn

I ended up with 200 g of  Hawser ply yarn

It's exciting to make mistakes and discover new things isn't it. I think I will make more of this type of yarn in the future, just because I can. It has also got me interested in exploring different plying methods (there are so many) and getting a bit more variability into my yarns.

Oh and I did eventually get to making some fingering weight yarn.

My second attempt at fingering weight yarn; merino this time.


Tuesday 23 September 2014

Spinning and Plying cotton - part two

Now for the fun bit...
Spinning cotton requires patience and practice. The method is different to wool and the settings on your wheel are different too.

First, the wheel. My wheel has a double band drive, which is not recommended for spinning using the long draw method (commonly used for cotton) as it is hard to adjust the wheel to take up the yarn slowly enough. I have found it is possible to use the long draw method with a double band wheel, you just need to be patient and keep a close eye on the yarn.

 I use what I would call a medium draw method that works efficiently for me. Instead of drawing the fibre back past my hip, as you do with the long draw, I draw back about 30 cm at a time before letting the yarn wind onto the bobbin. I also 'bend' the yarn a bit so I can control the twist in the yarn I am drafting. For non- spinners; drafting is pulling the fibre out into a thin line before the spinning wheel puts twist into it.

The clip below shows how an expert spins cotton using the long draw method.


This clip shows how I spin using my medium draw method.


It takes a long time for me to spin a bobbin of cotton, but I enjoy the challenge of getting the single (the un-plyed strand of yarn) smooth and even.

The singles are getting fairly even.


Almost filled a bobbin, just a few more nests.

When the bobbin is full it is time to ply the yarn....see you then.

Tuesday 22 July 2014

From fleece to tote bag and all stops in between - part five


This is the final step in the making of a tote bag from scratch; felting (or fulling). First let me explain the difference between felting and fulling; felting is the actual process of entangling fibres tightly together to make a solid material, raw wool is felted. Fulling is the process of partially felting knitted items to provide a stronger bond between stitches, knitted items like my bags are fulled. The process for felting or fulling is the same; everything your mum told you not to do with knitted clothing in the laundry.
If you are interested in wet felting wool, follow the link to a good tutorial.
If you are interested in fulling pure wool knitted (or crochet) items, follow this link to a good tutorial

My licorice allsorts bag, all ready to be fulled.


The bag is knitted up and looks just like licorice allsorts to me, so that's what I called it. The exciting thing about fulling knitted items is that you can never be sure how much or how fast the felting process will go, so the results are infinitely variable.
So here's how I go about it...
First I fill the washing machine with cold water and add some shampoo (which seems to make fulling go faster) I only just cover the items to be fulled so the water level is low. Then I switch the machine on (after fueling and starting the generator as we have no 240v electricity) and let it wash for a while. In the meantime I boil a big pot of water on the wood heater. Once the water is boiling I carefully carry the pot into the laundry and tip the hot water into the washing machine, this temperature change is generally enough to 'shock' the wool into felting. I then spin out the item and hang it to dry while stretching it into the shape I had intended as far as possible.

My bag after fulling, hanging in the sun to dry.

An example of the unpredictability of fulling; the dark blue and black stripes didn't felt as much as the other colours.

That is the end of the journey from fleece to tote bag. As you can see; it takes a while to get there, but the results are worth it.

Did you enjoy this series?
Should I do more of them?
What else would you like to read about?

Friday 25 April 2014

From fleece to tote bag and all stops in between - part two

I have carded up a 100g batch of washed wool into cute little rolag 'nests.
Now for the spinning.....

Spinning can be seen as a science, an art or a craft. I like to think of it as a craft; I don't get too scientific or precise about it, I just spin.
So..I sit in my crafting nest in the lounge room and spin while I watch a DVD or just sit and enjoy the quiet. It takes me about four hours of spinning (broken up into movie length lots) to fill a bobbin. Then it needs to be plyed into a strong yarn.


All ready to spin...coffee; check....rolags; check.....spinning wheel......

Spinning wheel; check
A half spun bobbin of singles.


A full bobbin

There are so many ways to ply yarn, it would take me all day to explain them. I usually use a Navajo ply method which uses a single bobbin rather than two or three bobbins.


Once the yarn is plyed, I wind it onto a niddy noddy to make a skein which is then tied together and washed again to set the twist. This part is fun as I take the yarn out of the bath (as described in part one), squeeze the water out of it somewhat and then whack it against a post with some vigour. This gets my dogs all excited (maybe they think I've gone mad) and they all start barking like loons and jumping around.


A bad photo of me plying

Half a bobbin of plyed yarn
My niddy noddy
The finished skein (badly over exposed, but you get that with the flash)

Once the excitement dies down, I hang the skein on a contrived rack (on my wool cupboard) to dry, or I may decide to dye it first.

Part three is the yarn dying process.... see you then.


Glossary
Ply- Twisting two or more strands of yarn together to produce a stronger, thicker yarn.
Single - A single length of yarn, spun onto a bobbin, prior to plying.
Niddy noddy - A tool used by spinners to wrap wool around when making a skein.
Skein - A neat parcel of yarn, made by looping yarn in equal rounds.