The wide ranging experiences of someone who lives in the Australian bush in a knocked together tin shed with a heap of animals and still manages to hold down a job, study full time and raise a family.
Well...not quite. I still have the matter of a ten week intern-ship to complete (trying not to stress too much), but the academic part of the degree is finished. It has been a long four years of study, most of it enjoyable, some of it torturous (maths units spring to mind) but all of it educational.
By the end of 2016 I will be a fully qualified, card carrying Primary School Teacher.
The last four years have been spent largely either working or studying, with little snippets of craft or building squeezed in around them. Now I plan to spend some time....
Building the garden;
Building a new cover over the trailer bed and replanting.
Refurnishing the Hugelkultur beds and planting.
Crafting with fibre;
Making fulled bags
Spinning cotton and wool
Knitting
And more knitting
Dyeing homespun yarn
A lot of homespun yarn
Building my business;
Trying to attract more customers
Adding new products...both hand made and....
Naturally harvested.
Learning new skills
Increasing my stock
Building a house;
Well...maybe I'm dreaming.
Spending time with my animals (and family and friends);
Also...enjoying the finer things in life;
Like unravelling old jumpers by the fire...with wine
And watching sunsets...with wine.
It has been a long, life changing journey so far, I wonder what will happen next?
Another journey of exploration for me... card weaving. Also known as tablet weaving, this art has been used to make straps and decorative edges for centuries (there is nothing new under the sun). I first read about it while researching naelbinding (or needle binding) and other Viking textile methods. I have yet to perfect the art of making socks with a horn needle and wool (naelbinding) but I did give tablet weaving a go. I made a short lead for Shaun and a long lead for Sid and am now in the process of making a collar and lead set for my daughter's dog; Val.
The basics sound deceptively easy; just make some cards with a hole in each corner. I used old milk bottles to make mine, the plastic is thin but strong and I can write on them with a permanent marker. My cards are two and a half inches square with the holes a half inch in from the corner.
Then thread them up according to the draft pattern. I decided to start with a really simple one that gives ovals.
The warp (the long bits of yarn you weave through) is tied to two fixed points (or one to your belt and one to your toe) and away you go.
Simply turn the cards forwards or backwards (depending on the pattern) to open new sheds (the gap you put the weft [the bits of yarn that goes from side to side in weaving] through).
I have learned some lessons on this journey...
My cards, made from cut up milk bottles
First and most importantly- don't let your warp threads get twisted or you end up with a huge mess and a red face (possibly high blood pressure too). Eventually I figured out that cutting each card's worth of warp and pegging them individually to a coat hanger was quicker than cutting big numbers of each colour then sorting them out later.
My first mess of warp strings...waiting to be sorted out.
Now I just cut them and peg the until I am ready to thread.
Secondly- It is much easier to move when you aren't tied to a door, or life is easier with a loom. I made a simple frame for my card weaving warp after my first weaving session. This simple loom is made from PVC pipe and 90 degree angle joiners. It works really well and I no longer take ten minutes to get free of the warp so I can answer the phone, check on a squawk from outside or go to the loo.
A really simple card weaving loom
Thirdly- keep your cards all together with a clip when you advance the warp to weave a new bit. If you don't you could end up having to untangle a pile of warp threads all over again (I did).
This handy clip keeps the cards all aligned and neat when I'm not weaving and when I move the warp up.
Lastly- be prepared to be endlessly awed by the beautiful bands you can make with just a simple warp and some bits of plastic.
Shaun's lead on the loom
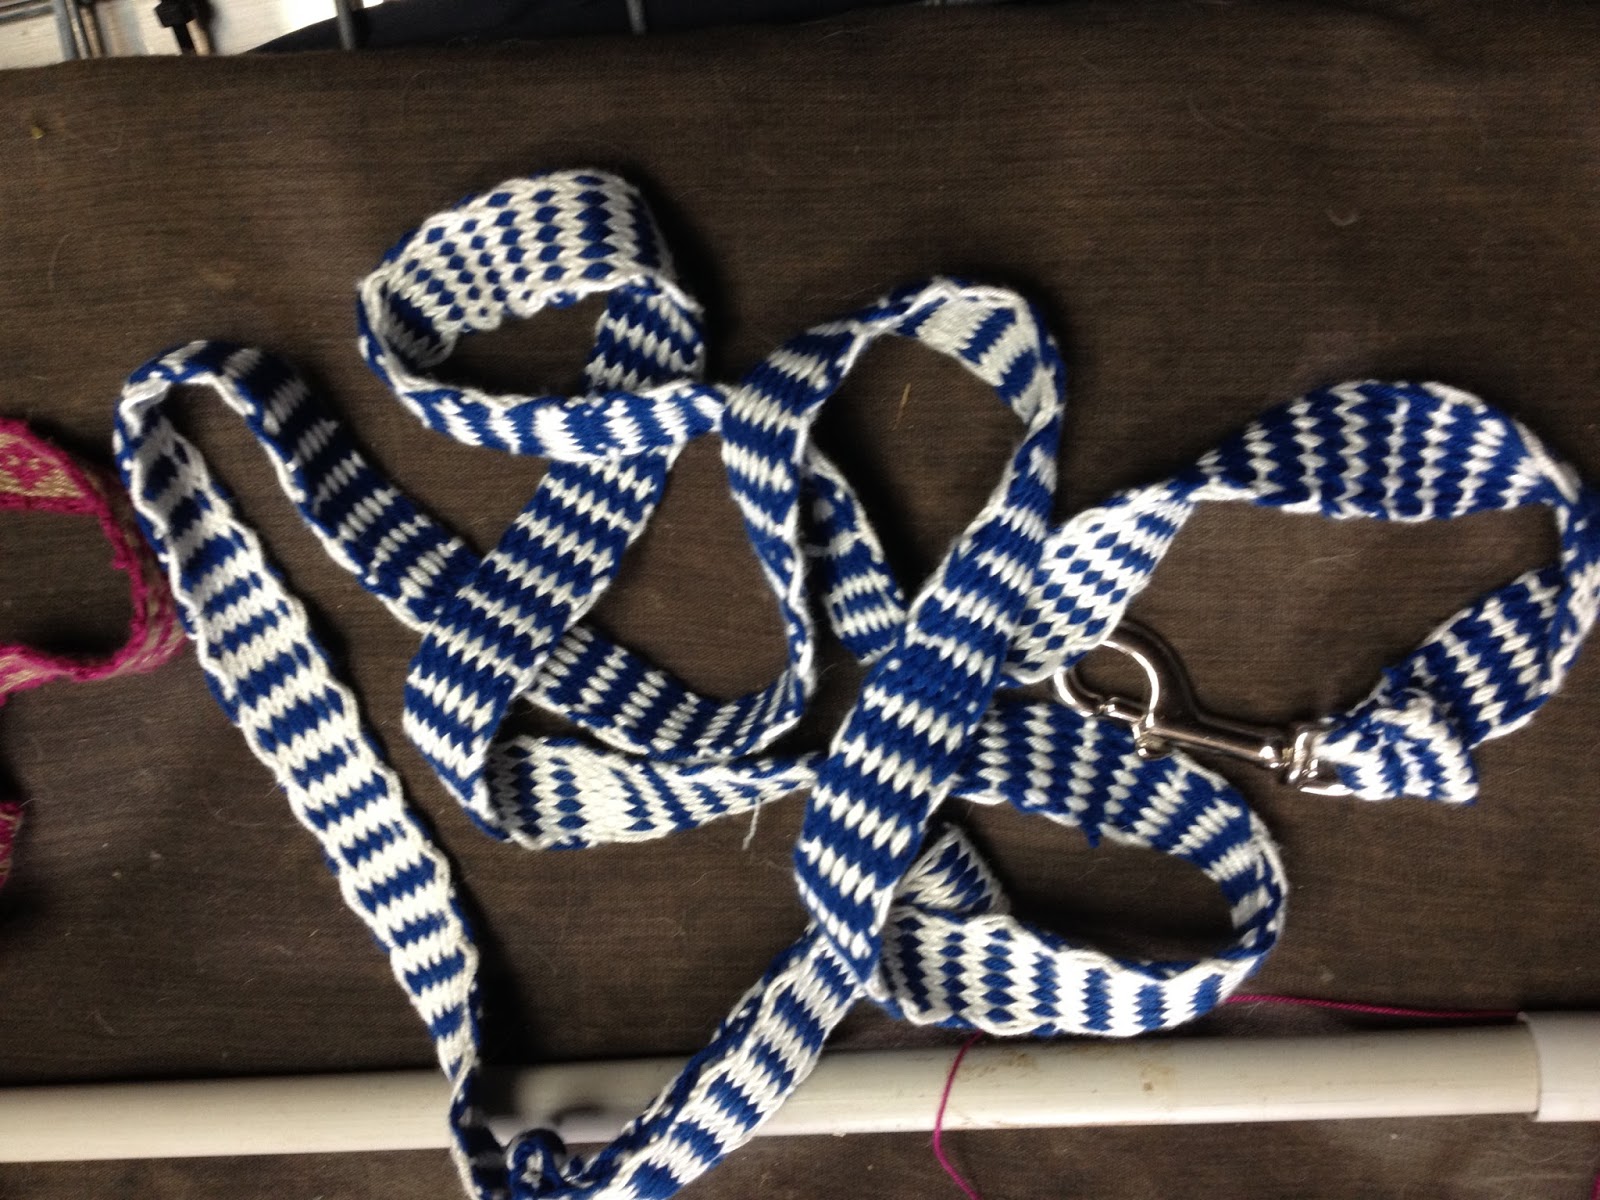
The finished lead, I love the patterns and it is so strong.
The second attempt at a lead. I made a few mistakes in the card turning, but it's strong and useful anyway.
Sid loves it, because it's longer than Shaun's and he can graze as we walk.
The third attempt. This will be part of a collar and lead set for Val; my daughter's dog.
As you can see I'm far from an expert, my selvages are still messy and I miss threaded one card on the latest warp (the pink dot in the green circles), but I am getting better at it and enjoying the process. Life is good when I can learn new things.
Oh and Book Book (my youngest daughter's hen) is sitting on a nest in an old chest of draws, no...not in the house. She will hatch some lovely champagne frizzles soon and I will have chickens to watch again.